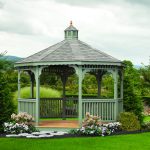
Most homeowners look at DIY pavilion kit cost and compare only the price tag. A cheaper kit sounds like a smart deal, especially if it claims “easy assembly” and advertises fast build time. But a pavilion is not a decoration, it holds weight, resists wind, handles rain, and carries the load of a full roof year after year. At Atlantic Outdoors, we’ve seen how saving a little up front can create bigger problems later, especially when the structure is built with the wrong beams, hardware, or joinery.
If a pavilion isn’t strong enough to handle weather or roof stress, it doesn’t matter how affordable it was. Understanding how price relates to strength is the best way to judge real value. Below, we explain how materials, joinery, and beam spans affect both the DIY pavilion kit cost and the lifespan of the structure.
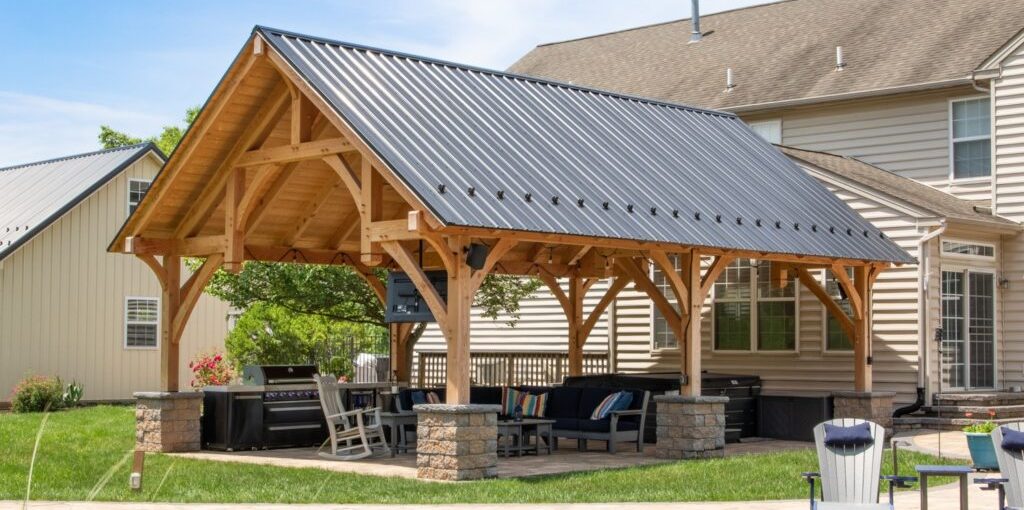
Cheap Kits Use Shorter, Weaker Beams
Low-cost kits often seem sturdy in photos, but the strength of a pavilion depends mostly on the beam span, which is the distance a beam covers without support. Shorter beams are cheaper because they use less lumber and don’t require structural engineering. The problem is that short spans require more posts, which can clutter the space and weaken long-term performance.
Here’s how beam span affects DIY pavilion kit cost:
- Short spans = cheaper materials
- Long spans = engineered beams that cost more
- Long spans also require stronger joinery
A cheap kit uses short beams so it doesn’t need to prove structural strength. An engineered pavilion uses thicker or laminated beams that can span wider distances safely. This is why two kits that are the same size can have very different prices.
If you’re comparing DIY pavilion kit cost, check how far the beams span. A longer, engineered beam isn’t just a cost upgrade, it’s a safety upgrade.
Hardware-Heavy Builds Seem Easy but Cost You Later
Many low-cost pavilion kits rely on metal brackets to hold everything together. These bracket-heavy designs reduce labor and allow anyone to assemble the parts, but they don’t always age well. Metal expands and contracts with temperature changes. Over time, screws loosen, brackets shift, and the structure begins to sway.
Builders often describe this as a “loose feel” in storms or high winds. It’s not a sudden failure, but gradual weakening. When comparing DIY pavilion kit cost, look at how much of the structure depends on surface brackets instead of internal joinery.
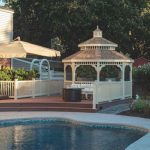
Strong pavilions don’t rely on visible brackets. They use thicker lumber, deeper posts, and secure joinery that locks the frame together. This type of build costs more upfront but saves repairs over time.
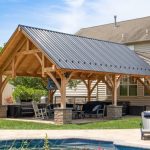
Mortise-and-Tenon Timber Costs More Because It Lasts Longer
Mortise-and-tenon timber joinery is one of the oldest and strongest ways to connect beams. Instead of screws doing all the work, the wood locks into wood. The structure can support heavy roof loads without relying on exposed metal hardware.
Here’s how proper joinery affects DIY pavilion kit cost:
- Precision cutting adds labor
- Beams must be thicker
- The pavilion stands longer without repair
- The frame carries weight naturally, not just through bolts
Mortise-and-tenon doesn’t just cost more because it takes time. It costs more because it produces a pavilion that doesn’t get weaker over the years. This is the difference between a weekend project and a permanent outdoor structure.
When homeowners ask about DIY pavilion kit cost, they often compare finishes or sizes, but the joinery is what really decides how long a pavilion will stay safe.
The Hidden Costs of “Cheap” Pavilion Kits
A low-cost kit doesn’t show long-term expenses in the price. The risk shows up later through:
- Repairs from roof sagging
- Replacing warped beams
- Adding stronger posts after shifting
- Fixing loose hardware connections
- Extra protection against termite or moisture damage
Suddenly the “cheap” kit becomes more expensive than a stronger one. This is why judging DIY pavilion kit cost by price alone doesn’t help you save money.
A higher-quality kit usually comes with:
- Stronger lumber
- Longer spans
- Weather-resistant assembly
- Better load engineering
- Fewer maintenance needs
When those things are included, you’re not paying for extras, you’re paying to avoid constant repairs.
A Smart Pavilion Investment Is Still DIY, Just Engineered
You don’t have to spend a fortune, and you don’t have to give up the satisfaction of building it yourself. The best approach is to choose a kit that offers real structural integrity and still allows for hands-on assembly.
When evaluating DIY pavilion kit cost, ask brands:
- What is the beam span?
- What type of joinery is used?
- How thick are the structural posts?
- Is hardware doing the work, or the wood?
- Can the roof structure handle snow and wind load?
These questions protect your investment better than price comparison alone.
Stronger Pavilions Feel Better, Last Longer, and Look Better Over Time
A pavilion should feel solid under your hands and under a storm. It should not sway, loosen, or sag. Cheap kits may look similar on day one, but they do not age the same way.
At Atlantic Outdoors, we design kits using engineering standards that put strength before shortcuts. If you want help choosing based on structure, not just style, we can guide you so you get the best DIY pavilion kit cost without sacrificing durability.
A pavilion is a long-term structure. Paying a little more for real strength is not extra spending, it’s smart building.